

2Store setup
The basics every store needs: who you are, how customers pay and how orders reach them. You'll find all of this under Settings → Store setup, as five short steps along the top of the page.
Store details #
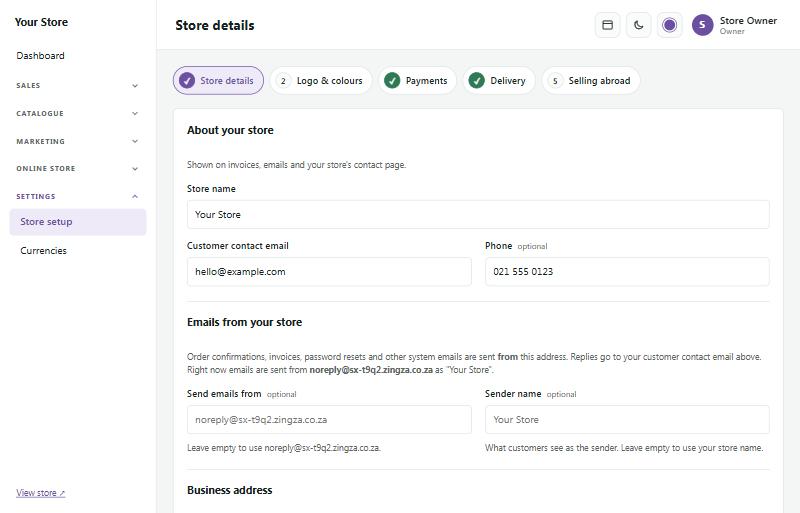
Settings → Store setup → Store details
- Store name: shown in your store's header (if you have no logo), on invoices and in emails.
- Customer contact email and phone: shown to customers and used when they reply to your emails.
- Emails from your store: the address your order confirmations, invoices and other emails are sent from, and the name customers see as the sender.
- Business address, VAT number, company registration and importer's code (your customs importer's code, if you have one): shown on your legal pages. Beside each number, Show on invoices and Show in the store footer choose where else it appears. South African law (ECTA section 43) requires your name, contact details and physical address on your website.
Press Save and continue to move to the next step.
Logo, colours and site icon #
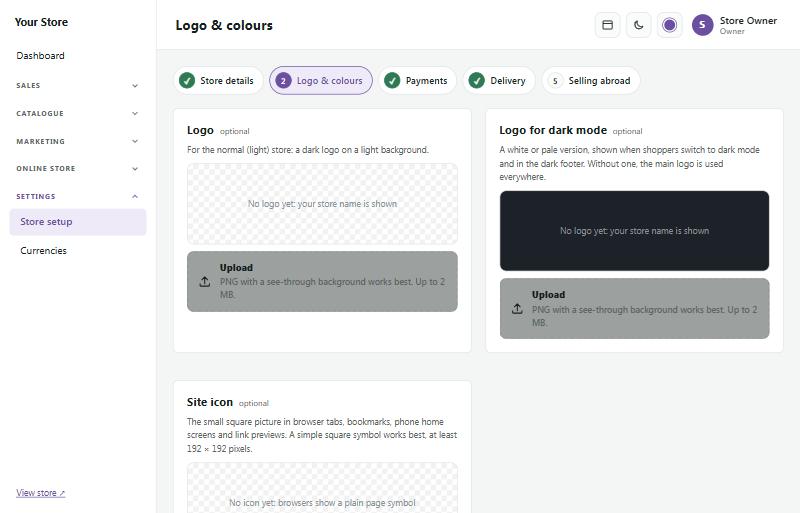
Settings → Store setup → Logo & colours
- Logo: a PNG with a see-through background works best. It's shown in your header, on invoices and in your price list.
- Logo for dark mode: a white or pale version, shown when shoppers switch your store to dark mode and in a dark footer.
- Logo for phones and Phone logo for dark mode: a compact version (for example the name without the tagline, or a smaller symbol) for phones and tablets, where a wide logo would shrink too far. Without one, the main logo is used.
- Site icon: the small square picture in browser tabs and bookmarks, and the thumbnail shown when someone shares a link to your store (for example on WhatsApp). Use a simple square symbol, at least 192 × 192 pixels. Until you upload one, SaleCart makes one for you: the first letter of your store name on a rounded square in your brand colour. It updates when you change the name or colour. Tick Remove this icon to go back to the automatic one.
- Brand colour: used for buttons, links and highlights.
- Tagline: one short line about your store, used in search results and link previews.
The preview at the bottom shows your header in light and dark mode before you save.
Payments #
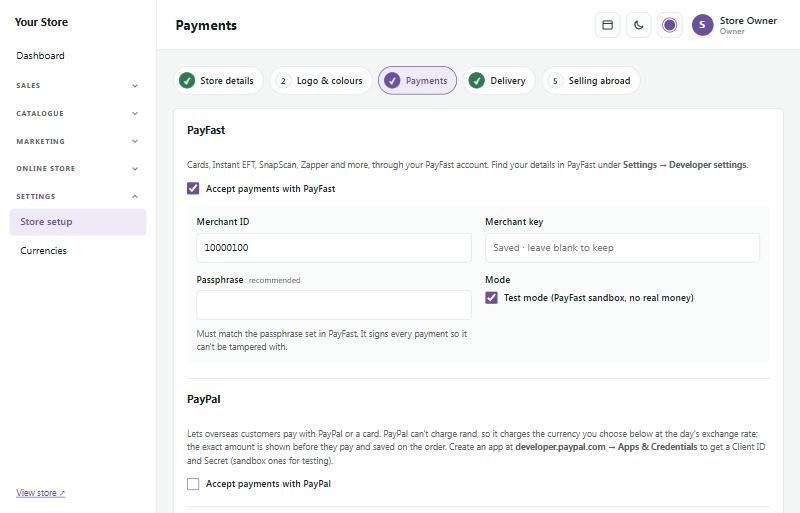
Settings → Store setup → Payments
Switch on the ways you want customers to pay:
- PayFast: cards, Instant EFT, SnapScan, Zapper and more. Enter your Merchant ID, Merchant key and Passphrase from your PayFast account (Settings → Developer settings in PayFast). Untick Test mode when you're ready to take real money.
- Yoco: card payments (Visa, Mastercard, Apple Pay, Google Pay). Paste your secret key from Yoco (Sales → Payment gateway). A key starting `sk_test_` takes test payments; use your `sk_live_` key to take real money. Payment notifications are set up with Yoco for you when you save.
- Ozow: instant EFT, straight from the customer's bank account. Enter your site code, and the client ID and client secret from the Ozow portal (One API → Clients). Untick Test mode when you're ready to take real money. Optional: add a webhook in the Ozow portal pointing to the address shown on the settings page, so payments are confirmed even if a customer closes the page early.
- Peach Payments: cards, instant EFT, buy-now-pay-later and the other options you have with Peach. Enter your merchant ID, entity ID, client ID and client secret from the Peach Payments dashboard, and add your store's address to the allowed domains under Checkout in Peach. Untick Test mode when you're ready to take real money.
- PayPal: lets overseas customers pay in their own currency. You need a Client ID and Secret from developer.paypal.com.
- EFT (bank transfer): enter your bank details. Customers see them at checkout and in their order email. Choose how many days you'll hold an unpaid EFT order before it's cancelled.
Buy now, pay later
Customers can split an order into interest-free payments. The provider pays you the whole order (less its fee) and collects the instalments from the customer. Each provider needs its own merchant account, and each starts switched off.
- Payflex: pay in 4, a quarter at checkout and the rest every two weeks. Enter the client ID and client secret Payflex sends you. Your lowest and highest order amounts come from your Payflex account and are checked every day.
- PayJustNow: pay in 3, a month apart. Enter your merchant ID and API key from PayJustNow, and the smallest and largest order in your agreement.
- Happy Pay: pay in 2, on the customer's next two paydays. Happy Pay comes through Ozow or Peach Payments: ask them to switch it on for your account, then choose that gateway under Paid through. Customers choose Happy Pay on Ozow's or Peach's payment page.
Press Test connection to check the saved details. Test mode uses the provider's sandbox, with no real money. A provider only shows at checkout when the order total is within its amounts, and never for a lay-by.
Two switches show "Or 4 interest-free payments of R … with Payflex" under product prices and in the cart.
To refund a Payflex or PayJustNow order, use Refund on the order and choose Back to how they paid: the refund goes to the provider straight away. If the provider refuses it, nothing is recorded and the reason is shown.
Delivery #
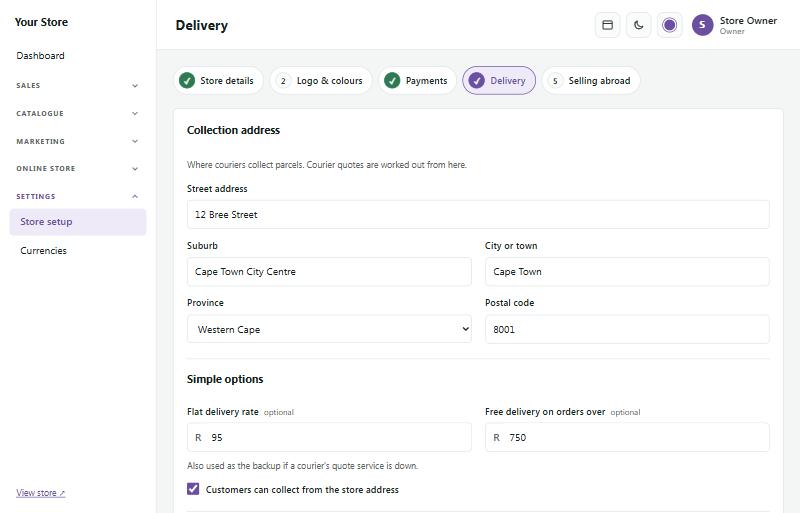
Settings → Store setup → Delivery
- Collection address: where couriers collect parcels from. Courier quotes are worked out from here.
- Flat delivery rate: one price for every order, for example R95.
- Free delivery on orders over: for example R750. Leave it empty to never give free delivery.
- Customers can collect: tick this if shoppers may collect from your address for free.
- Couriers (optional): connect The Courier Guy, Bob Go, Fastway, FedEx or DHL to show live delivery quotes at checkout and track parcels automatically.
- Lockers and pickup points (optional): switch on PUDO lockers or Pargo pickup points so customers can have their parcel sent to a locker or a shop near them.
Each product's weight and size (on the product page under Shipping) are used for courier quotes.
Bob Go
Bob Go is one account for many couriers. Paste the API key from your Bob Go account (Settings → API keys). Checkout shows the delivery rates you set up in Bob Go. When you book an order, you choose from the couriers' own services and prices, and Bob Go sends the booking to that courier.
PUDO lockers and Pargo pickup points
At checkout the customer chooses PUDO locker or Pargo pickup point, then picks the locker or shop. They can type their suburb, town or postcode, or tap Use my location. They don't need to fill in a home address. The chosen point is shown on the order and becomes its delivery address.
- PUDO: paste your API key from the PUDO customer portal. The price depends on the locker box size (XS to XL). Your store picks the smallest box that fits the parcel. Under How parcels start, choose whether a driver collects from you, or you drop parcels at your own PUDO locker (cheaper; enter its code).
- Pargo: enter the API username and password Pargo sent you, and your Pargo price per parcel (Pargo charges a fixed price on your contract).
Your markup and handling fee are added to locker and pickup-point prices too. Free delivery over your set amount goes to the cheapest option, whether that's a courier, a locker or a pickup point.
More couriers
- Courier IT and CitiSprint: both run on the ShipLogic platform, like The Courier Guy. Tick the courier, paste the API key from your account with that courier, save and test. You get live quotes, booking, waybills and tracking. Customers get a link to the courier's tracking page.
- Uber Direct: same-day delivery by an Uber driver. Enter the customer ID, client ID and client secret from your Uber Direct dashboard, and list the towns, suburbs or postcodes near you, one per line (80\* covers every postcode starting with 80). It's only offered to those addresses. Book it from the order page; the customer gets Uber's live tracking link.
- Parcelninja: for stores whose stock is in Parcelninja's warehouse. Enter your API username and password. Book on a paid order sends it to Parcelninja, or tick the box to send paid orders by themselves. Items are matched by SKU. When Parcelninja dispatches the parcel, the order is marked shipped and the customer gets the courier's tracking number.
- Bob Go couriers by name: under Bob Go, choose These couriers' own prices and tick couriers such as RAM or Skynet. Customers see each courier's live price by name, and you book the same service from the order page. Only couriers your Bob Go account is linked to can quote.
Other couriers (booked by you)
Settings → Store setup → Delivery → Other couriers
For couriers you book yourself, by phone or on their website: Dawn Wing (DPD), RAM, Skynet, Globeflight, Paxi, PostNet, Picup or any other. Pick one from the list (its tracking page is filled in) or add your own, set the price (one price, or up to five weight bands like "up to 2 kg: R65"), and switch it on. Customers pay the price you set; your markup is not added.
- To the door: delivered to the customer's address.
- Counter to counter (Paxi, PostNet): the customer types the PEP or PostNet store they'll collect from, with a link to the courier's store finder.
- Local same-day (for example Picup): only offered to the towns, suburbs or postcodes you list.
When you send the parcel, choose the courier under Mark as shipped and type the waybill number. The customer's email and order page then show a Track your parcel link. In the tracking page address, put {code} where the waybill number goes. Without it, the link opens the courier's tracking page and the customer types the number.
Big items, specialised couriers, handling and insurance
Catalogue → Products → a product → Delivery
For items that can't simply go in the same box as everything else, like a wheelchair, a massage table or sensitive equipment:
- Ships on its own: at checkout the item gets its own delivery choice and price, and the rest of the cart travels together. A customer buying a wheelchair, a massage table and a first aid kit chooses a courier for each of the three. Two of the same item go with one courier, priced per box.
- Only these couriers: tick the couriers that may carry it, for example a specialised medical courier you added under Other couriers with its own prices. Only those are offered for it.
- Fixed delivery price: one price per item instead of courier prices, with the name checkout shows (for example "Specialised medical courier").
- Handling fee: added to the delivery of the parcel the item is in, per item.
- Insurance in transit: a percentage of the item's price, always charged or, with Let the customer choose insurance, a box the customer ticks.
- Delivery quoted by us: for a special heavy item whose delivery you arrange and price yourself. It can't be checked out. In the cart it shows Ask for a delivery quote: the customer gives their details and delivery address, and that item (only that one) becomes a quote request under Sales → Quotes, with its handling and insurance filled in from the product. You add the delivery cost, check the handling and insurance, and send the quote. The customer accepts it and pays for the item and its delivery together. The rest of their cart checks out as usual. Delivery quotes work even when quote requests from the cart are switched off.
Many products at once: tick them on Catalogue → Products and choose Set how they ship… (on its own, delivery quoted by us, or with the rest of the cart). Export CSV has a column for each setting above and for the box size, and the SaleCart CSV import reads them back for the products it adds. Set box size… gives them all the same length, width and height (in cm; a size left blank stays as it is).
Live courier prices for each item come from the couriers you connected, worked out from the item's own weight and box size, so fill those in. Your other couriers price it by its weight bands.
Dispatch times and delivery estimates
Settings → Store setup → Delivery → Dispatch times
Tell shoppers when their order goes out and when it should arrive. In-stock products then show a line like "Order within 2 h 13 min for dispatch today" and "Estimated delivery: Thu 9 – Mon 13 Oct" under the Add to cart button. It counts down by itself. Checkout shows the estimate under the delivery choices.
- Cut-off time: orders placed before it go out the same day. Later orders go out on the next dispatch day.
- Days you send parcels out: Monday to Friday to start with. Tick Saturday if you also send on Saturdays.
- Delivery time once sent: how many working days your usual courier takes, like 2 to 4. Weekends and public holidays aren't counted.
- Don't send parcels on South African public holidays: built in, including Good Friday, Family Day and the Monday after a holiday that falls on a Sunday.
- Other closed days: your year-end break or stocktake, one date or range per line, like `2026-12-24 to 2027-01-04`. Add any extra holiday the government announces, like an election day, here too.
It's off until you tick Show when orders go out and when they should arrive. Sold-out, backorder and "call for price" products don't show it, and nor does showcase mode.
Delivery days and time slots
Settings → Store setup → Delivery → Delivery days & time slots
Let shoppers choose the day and time for local delivery or collection, the way a farm stall, florist or food shop works. Each delivery method gets its own weekly time slots: your flat-rate delivery, Collect from our store, and your own local delivery (add it under Other couriers as a local courier with your areas). Couriers aren't included: they choose their own delivery day.
Open a method and set:
- Weekly time slots: the times (like 08:00 to 12:00), the days each slot runs, Orders per slot (empty = no limit) and an Extra fee (empty = none), for example R30 for an evening slot. The fee is added to the delivery price at checkout. Tick Remove to drop a slot; orders already booked keep their time.
- Lead time (hours): the fewest hours between ordering and the start of a slot, to pick, pack or bake.
- Order by, for next-day delivery: for example 14:00. Orders after 14:00 can't choose tomorrow.
- Same-day delivery, for orders before: tick it to offer today's slots until that time. Unticked, today is never offered.
- Days to show: how far ahead shoppers can book, like 14 days.
- Days you're closed: South African public holidays for the next 12 months are filled in and closed. Untick a holiday you work on. Add your own closed days in Other closed days, one date or range per line, like `2026-12-24 to 2027-01-04`.
- Shoppers must choose a slot: untick it to make the slot optional ("No preference" is then offered too).
It's off until you tick Offer time slots at checkout. The page shows what shoppers can choose right now. All times are South African time.
At checkout, shoppers see a row of days and the slot buttons. A full slot shows Full and can't be chosen. The slot is checked again when the order is placed, so two shoppers can never both get the last place. A cancelled or refunded order frees its place.
Selling abroad and currencies #
Settings → Store setup → Selling abroad decides whether you deliver outside South Africa and which countries you ship to. Exported orders can be zero-rated for VAT.
Settings → Currencies adds a currency switcher to your store, so overseas shoppers can see prices in US dollars, euros, pounds and more. Your prices stay in rand: PayFast, Yoco, Ozow, Peach Payments and EFT always charge rand, and the converted prices are a guide. Exchange rates update by themselves every day.
Going live #
The Go live page (in the menu under Dashboard) checks that your store is ready:
- Store name, email, phone and address filled in.
- Products for sale, and sample products removed.
- A way to pay, with every payment company you use out of test mode.
- Delivery prices and your legal pages (terms, privacy, returns).
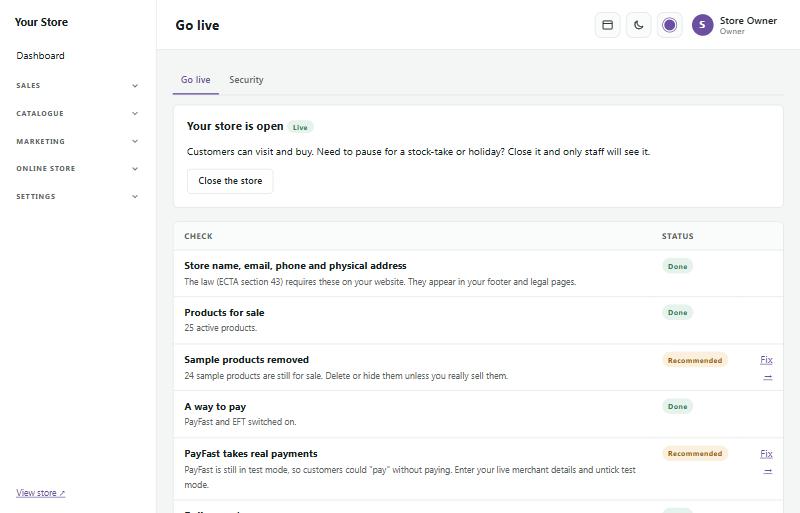
Items marked Done are ready; Recommended items have a Fix link that takes you to the right page.
When you're happy, press Open my store (it stays greyed out while a must-have item is missing). Until then, visitors see an "Opening soon" page while you and your staff can browse the real store. You can close the store again at any time, for example during a stock-take: press Close the store on the same page.
While the store is closed
Under While the store is closed on the Go live page you choose what visitors see instead of your store:
- Heading: "Opening soon" for a new store, "Back soon" when you've closed for a while, or your own words.
- Your message: an optional note, for example "We're doing a stock-take, back on Monday."
- Reopening date and time: shown as "Back on Monday 20 October at 09:00". Tick Reopen automatically and the store opens by itself at that time (within about five minutes), as long as nothing on the Go live page is marked "Must fix". If something is, the store stays closed and the activity log says why.
- Show on the page: your store email, phone, WhatsApp number (if you've set one up) and tagline.
- The store's header and footer: untick it for a clean, centred page with only your logo: no menu, buttons or footer.
Press Preview the closed page to see it exactly as visitors do. Owners can also copy a shareable preview link: whoever opens it sees the real store for a day while it's closed (handy for a designer), so share it with care.
The Storefront strip at the top of your dashboard shows whether the store is Open or Closed (with the reopening time, if you set one), with a Close the store or Open my store button. While items still need fixing, it says how many and links to Go live.